Jokingly, we told them we would gladly take their existing one car detached garage off of their hands, as we could really use more storage space. We all got a chuckle out of that, until we started thinking that maybe...possibly...it could actually be done. At that time, our backyard had a small garden shed that was just big enough to hold our lawn mower and a few nests of rabbits under the foundation.

First, we poured a concrete foundation to set the workshop on.


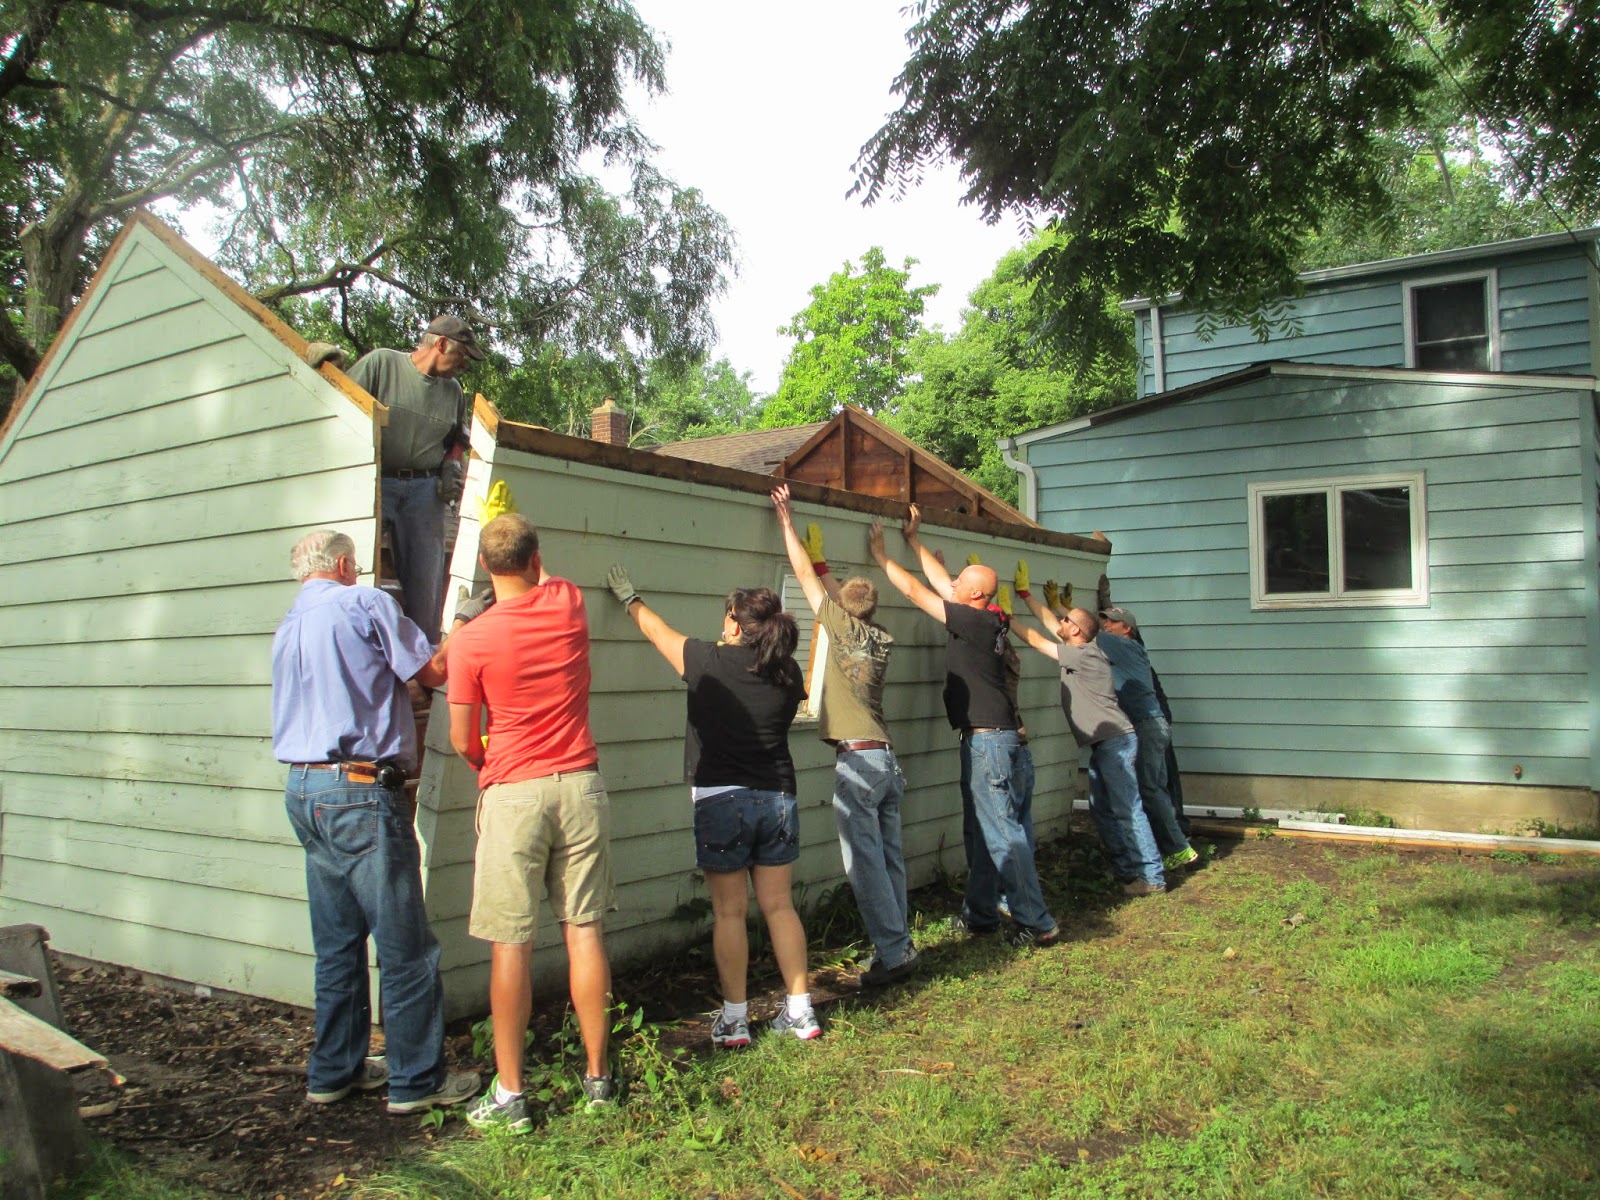
On the day of the big move, we sweet talked a few friends into coming over to help. The conversation went a little like this, "ahhhh...would you mind coming over Saturday morning to help us carry a building from our neighbors yard over to our yard?" To do this, my dad apart the garage at each of the corners.


The rest of that first day was spent building new roof trusses...
Since this was no longer to be used as a garage, the door opening had to be much smaller...so we used some scrap material to frame up the new front face of the workshop. By the end of the first day, we were already to the point you see below! Little did we know how much work we still had ahead of us!
After framing in the roof, but before shingling, we decided to add a dormer using a panel of windows from the old garage door - you can see all about that process here. Once the dormer had been installed, we began the agonizing task of shingling.


Origianally, the garage only had two windows - one on each side. We used the original two windows and relocated them to the front of the shop to flank the entrance doors. As I was scouring Craigslist one day for materials, we found four additional unpainted wood windows for $20 each that just happened to match the original windows. Adding two more windows to each side was going to majorly amp up our natural light situation. And Brent and I had an agreement from the very beginning of this process...that if we were going to have this huge building in our backyard, it had to be adorable to look at. Adding windows was an easy way to accomplish this.

New siding went up relatively quickly.

After the siding was installed, we used the original boards that came from the roof to build the soffits.


The siding got two coats of paint in a color called Organic Cotton, which matches our house.

We added some planting beds and mulch around the exterior to prevent mud from splashing onto the workshop when it rained - since we didn't have any gutters at this point.


I built shutters for each of the windows for less than $5 each. Here's a simple tutorial to build them.

The double doors on the front of the workshop came from our local Habitat for Humanity REStore, for a total of only $80!


Whew...I'm exhausted and we've barely begun to work on the INSIDE!! Good thing we aren't in any sort of hurry to wrap this up!
If you like this project, follow us on Facebook to see what else we're up to!
Ahhh, that looks so cute!! Those extra touches you added really made the difference!
ReplyDeleteThat is amazing - wow I'm so jealous! It must be a joy working in that space! I love the addition of the dormer windows too and those stink'n cute flower boxes.
ReplyDeleteMarie@The Interior Frugalista
Wow, what a great job!
ReplyDeleteYour shed is perfectly adorable! I dream of a day when we can have a house with a backyard and it would be extra wonderful to have a workshop/shed like this. I've saved your photo as inspiration. :)
ReplyDeleteThe exterior looks great, I was wondering how the interior is set up...
ReplyDeleteOUTSTANDING!!!!! GREAT JOB EVERYONE!! I LOVE IT!!!
ReplyDeleteI want it!!! That is so cute... and kewel how it all came together. :)
ReplyDeleteI'm totally inspired - I want one, too. May I borrow your hubby . . . lol?
ReplyDeleteThis is beautiful - thank you for sharing!
ReplyDeleteOh my but I am jealous! So adorable, who wouldn't want to be in there doing what we like the best. I am showing this to my son in the hopes he will see how much joy this would bring his dear old mom.
ReplyDeleteI like the shed, can be used extra room for hobby business. What about adding some lights and energy-efficient items to add heat. Is that in the works?
ReplyDelete