Sunday, August 30, 2015

Milk Paint Furniture Project

My neighbors were selling a bedroom set this summer that I absolutely fell in love with!  The finish wasn't my personal preference but the overall style of the headboard and footboard were right up my ally.  The set was for a queen bed but since we don't have a queen size bed in our house, I painted this set for someone else.
There were these strange wood balls on the top of the headboard and footboard - those would definitely be coming off :)
It was great that all of these pieces of molding had been layered to give the headboard and footboard a great profile.
 And the absolute best part was that the bed had already been distressed.  The idea of painting this bed really got my blood pumping because I knew glaze would pick up all of these little distressed marks and the vertical planks of the headboard and footboard and really make them pop.
 Here's the footboard...
 And a matching dresser with one drawer and a shelf inside the double doors.
The first step was to remove the balls.  Brent used a pipe wrench to twist them and loosen them up.
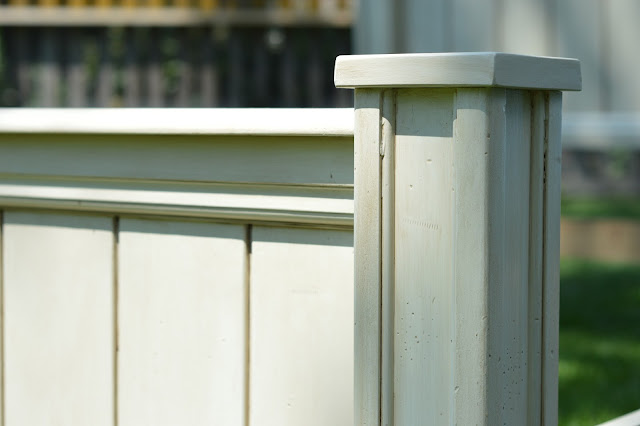
 In their place, he made simple caps and pinned them with air gun.
 I was going to use General Finishes Milk Paint for this project, which means you don't need to sand your finish before applying the paint.  The old finish had such a thick. shiny finish that I chose to sand the set before applying the milk paint.  I just didn't want to take any chances with chipping paint. This step was likely unnecessary but it gave me a little extra insurance.

I was really conflicted at this stage because the headboard was so beautiful in it's natural wood state.  A coat of walnut stain would have been gorgeous but I could also see it as the antique white that my brain was envisioning.
 After sanding, I wiped the piece with denatured alcohol to prepare it for paint.
 This is the General Finishes Antique White Milk Paint that I used.  Sometimes I only put one coat of paint on, depending on what I want the finished project to look like.  For this piece I wanted a nice solid color to start with before glazing so I did two coats of the milk paint.
After the two coats of milk paint, I began the glazing process.  I couldn't take any pictures because I was home alone and my hands get really dirty while glazing so I didn't want to be fumbling around with my camera.  Basically, I diluted my glaze slightly with water to give me a little more drying time as this was a large piece to glaze.  I worked in sections, for example, I would do one side of each leg, then I would do three vertical sections of the face of the headboard/footboard.  Working in smaller sections allows you to better control the finished project because you don't have to work as quickly.

In the photo below, the footboard has been glazed in front.  The headboard behind it only has the two coats of milk paint.  You can see how the glaze makes the vertical lines pop out and you notice the small molding details a bit better with the glaze.

 After glazing, I applied a few coats of a protective polyurethane to prevent chipping and it gives the piece a nice gloss.
 Here is the finished bed, including side rails.
 And here's the small matching side table.

Saturday, August 1, 2015

A New Exterior House Color!!

Each year for the past 3 years, I've scraped and painted one side of the house, slowly making my way around the entire thing.  It usually only takes a weekend to scrape and paint one side so it doesn't turn into a big commitment.  But each year that I go and buy another gallon of the same light yellow/cream paint, I dream about changing the house color.  Reality soon sets in though that completely changing the color of the house would be too much work and too much expense.

That is until the beginning of this summer when a friend of ours needed some help painting her house.  She went from a light colored house to a rich, dark color - and I fell in love.  It was only a matter of days until I had convinced Brent to let me do a little experimenting.  

I was having a problem with our roof color and figuring out what color of paint would look best with it.  The roof is called Burnt Sienna, which is sort of brown and sort of reddish.  But when I looked closer at the shingles, I could see some dark spots, almost a navy or charcoal.  So I started messing around on Benjamin Moore's website to plug in different paint colors.  Benjamin Moore Hale Navy was the absolute winner.  Anything with too much gray or brown just didn't look right with the shingles.
I was still a bit nervous about taking the plunge so we bought a test pot and painted a swatch on the back of the house to look at it for a few weeks.  Even with a such a big test spot, I still couldn't pull the trigger so my neighbor friend suggested that I paint the entire front of the house first - that way if I didn't like it from the front, I wouldn't have painted the entire house already.
I liked that idea, so Brent and I spent a few hours on a Saturday evening and a few more the next morning painting the front.  Luckily, our house is small so it only took us about 4-6 hours total to paint the front, including the trim.  And we love it!!

We are most surprised to see the texture of the siding come out.  When the house was the lighter color, it was painted in a flat finish - which made it impossible to clean off muddy puppy paw prints and other smudges.  For the navy, we went with a satin finish which is why you can see more of the texture.  For the trim, we used Benjamin Moore Steam, which is a little bit softer than a bright white. 
Before we started painting, I was nervous about what our white gutter downspouts would look like on the front of the house, since before they blended in with the lighter paint.  But after painting with the BM Hale Navy and putting the downspouts back up, I think they look fine.
I love how our window trim and green plants pop out against the new house color.  But now our poor neighbors have to live with this view until our schedule clears out and we can paint the rest of the house!
And then there's this lovely view - oh man - we feel so trashy having a multi-colored house but I'm hoping that next weekend I can get the sides painted!
And for a final side by side - here's the before and after!  I am still undecided about the front door color and what, if anything, we'll do there.  Shutter options are still being weighed as well - but we'll worry about those once all the painting is done. 
And for your Pinning pleasure, here are all of the colors listed in one place.