Wednesday, December 17, 2014

Holiday Button Art

These unfinished cabinet door frames have been laying around in our basement for over a year and I was finally determined to do something with them.  Photos on Pinterest of people using buttons to spell out letters had been popping up in my feed, so I thought I could spell the word JOY with my three frames.  
Here's where I can save you a ton of time...since my door frames didn't have panel inserts, I had to make my own panel out of some scrap sheetrock we had laying around.  Plywood would have been a better option but we didn't have any and I wasn't going to waste the fuel to go to the home improvement store when the sheetrock that was laying around would work just as well.  Lucky for you though, you could use regular old cabinet doors with a panel still intact!
I had this really great turquoise burlap that I wanted to use, but burlap has a very loose knit making it especially see through.  So before I wrapped my burlap around the squares of sheetrock, I painted the sheetrock with a few coats of a similar turquoise paint that we had on hand, this way the white sheetrock wouldn't show through the burlap.  The wood frames got a few coats of antique white paint and some van dyke brown glaze to age them.

After the burlap was wrapped around the sheetrock, I placed it in the painted wood frame.
I don't have a fancy letter cutting machine, so to make the JOY letters, I simply printed each letter off on my printer and cut them out.  Since the letter would be painted red, I traced the letter pattern with a red marker to create the outline.

 Here's what my letter looked like after tracing it onto the burlap.
Using red metallic acrylic paint, I filled in the letter.  This is an important step because if you just use buttons without having the letter painted underneath, the letter will not look very solid because the buttons can't possibly cover all of the space.
Joanne's sells large packs of different colored buttons - I grabbed both of these packs so I could get some different sizes.
Before I started hot glueing anything, I laid some buttons out on the letters to practice a bit.  Some people layer the buttons, others just do a single layer.  I opted for the single layer when it was actually time to glue them down - mostly for my safety since I burnt my fingers about 100 times in the process with the hot glue.
After all three of my letter were complete, Brent used hardware like you see below to hook the frames to one another.
 We love our new holiday art and more importantly, we love that we did it for about $10!


Monday, November 24, 2014

Wood Block Christmas Countdown

I saw a cute idea on Cottage Paint's Instagram feed that I thought would be fun to make with the kids.  As I opened the door to our workshop to cut some blocks, I was happily surprised to find a set all ready for me!  Turns out, I had an extra set of blocks cut AND sanded from making wood block pumpkins a few weeks ago.  Guess this project was meant to be!
We started with some wood blocking, reclaimed wood, of course :)
Brent cut this star out with a jig saw - you have no idea how hard it was for us to draw a star.  I'm talking tricky enough that we had to google it.  Pathetic, huh?
 Emma helped me do all of the painting.
Here's our first coats of paint on the blocks.  We used base coats of regular latex paint and then brushed metallic acrylic paints over top of each one.
To do the wording - because free handing was not an option - trust me, I tried - I followed Her Tool Belt's instructions.  She used Photoshop to get her lettering but since I don't have that, good ol' Microsoft Word worked just fine for me!
 We covered each block of wood with a layer of painter's tape.
 And laid our wording on top.
Using an X-acto knife, I cut around each letter.  I thought this process was going to be pretty quick.  Spoiler, it took forever.  But I put on my headphones and listened to a few episodes of Serial - which is amazing if you haven't heard it - and the time passed rather quickly.
Then I put a few coats of acrylic paint in a contrasting color over the lettering.  Peel the tape off when dry.
 For the top block, where the number of days was going to go, I used this chalkboard paint.
 I taped off a section of the block for the chalkboard paint.
 2 coats later and once it had dried, you can pull the tape off.
 At first, I was planning to glue all of the blocks together but then decided not to.  It will be much easier to store after the holidays if it isn't such a large piece, plus, it's much easier for the kids the erase the top block and write the new number for the day if they can lay it down to do it.

 This was a fun project and the kids are having a blast changing the number each day!

Saturday, November 22, 2014

Instagram + Printicular = Ornaments

I'm guessing we are like most families, in that we take a million photos of our kids, vacations and special activities throughout the year but then the photos simply live on our computer.  We usually only print a family photo here and there because there just isn't a place to display the informal, yet just as important, special event photos.

One of our kids' favorite pastimes is to get out their big books full of baby photos we made for them several years ago.  When they were little, it was still totally normal to print gobs of photos instead of creating digital photo albums.

But why not create some special ornaments for the tree commemorating some of their favorite memories from the past year?  If we make just a few per year, at some point our tree will be full of all the little moments that shaped their childhood.
The materials for each ornament add up to about $2.50 each and were very simple to make!  We found these metal lids in the venting department at the home improvement store.  They are called round tee caps and come in all different sizes, 2" - 8" diameter.  Here's a link for something similar from Home Depot, although not the exact same as ours, these would work just as well.  Sometimes when I purchase candles, they have lids on them similar to these caps - so those would also be a perfect substitute.
The 4" seemed like the best size for the photos I was going to use and they cost just over $2.00 each.
I found a glass pyrex dish in our cupboard that was ALMOST the same size as the cap, which would mean once my photos were traced and cut out, there would be a small metal border around each photo.
For my photos, I downloaded the Printicular app to my IPad.  Printicular easily uploads your Instagram photos to Walgreens and are ready to pick up in an hour.  Walgreens is only blocks from our house and it's where we always have our photos printed, so this was a no-brainer!  Prices are about $.39/each.
I positioned my glass bowl on top of the photo and traced around it.
Cut out the shape....
I practiced my positioning to make sure they were going to look good before the glue went down.
And if you can believe this or not...this was my FIRST time using Mod Podge - pretty crazy, right!?  I brushed a coat of Mod Podge on the metal and then a coat on the back of the photo and stuck them together.  When that was dry, I brushed another coat over the top of the photo to seal it all in.
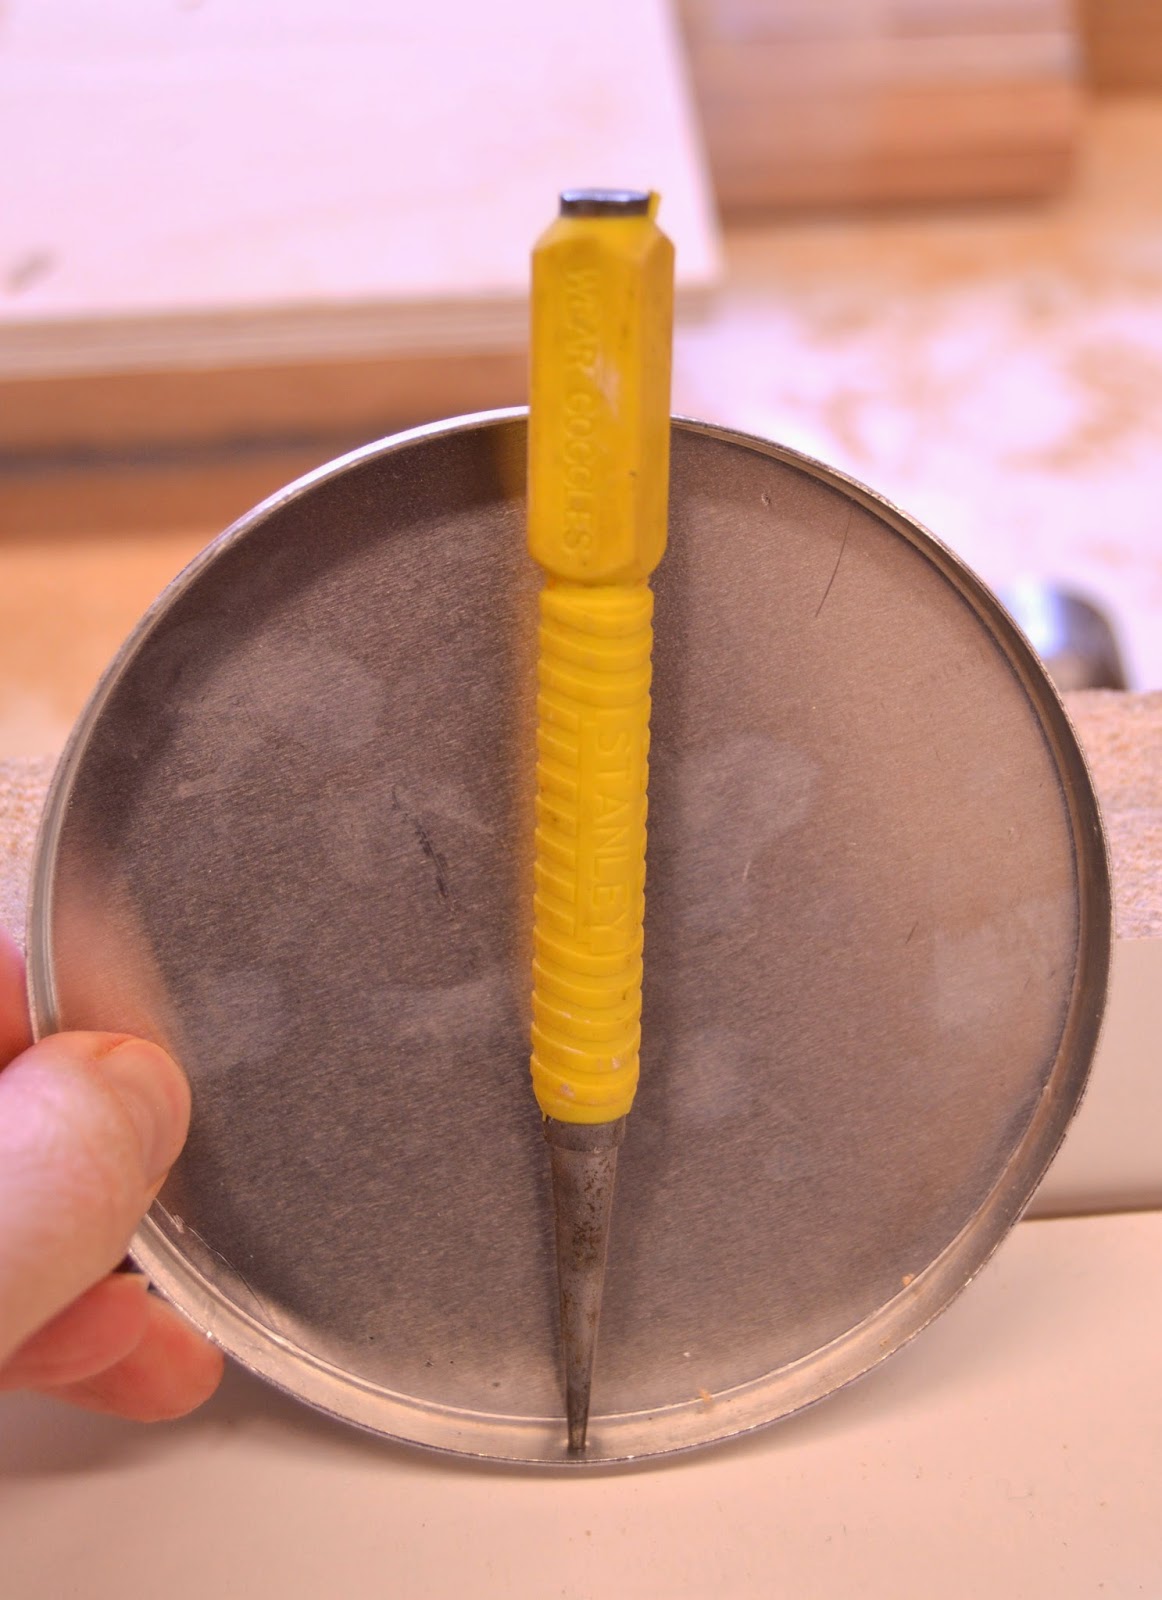
I asked Brent to drill a hole through the top of the ornament so I could attach my twine to hang it on the tree.  To do that, he used a nail set to make an indentation first.
And then he selected a drill bit, this size looked like it was going to work the best.
Before I put twine through the hole so they could be hung on the tree, I labeled the back of each ornament so we could remember the dates and special reason we had chosen that particular photo.
We love having these small tokens on our tree!  If our refrigerator wasn't stainless, I would have also attached magnets to the back so we could put them on the fridge year round.