Showing posts with label Interior. Show all posts

Wednesday, April 27, 2016

Kitchen Remodel

Some time ago, my sister and her husband, who live about 4 hours away from us, started dreaming of a new kitchen.  You can see in the photos below that their kitchen was difficult to work in and not a joyful place to be.  The refrigerator blocked the doorway that leads to the basement and to their exterior.  An old, unused chimney was taking up valuable space and the stove top was pressed against a wall, making it very difficult to put pans on half of the burners.

Planning for a full kitchen remodel is a long and daunting task.  Trying to keep within a reasonable budget but also creating a dream kitchen is a difficult balance to strike.  I can easily say it took months and months of planning and sketching to figure out what we were going to do with this space. Luckily my Dad has done plenty of kitchen remodels so working alongside him and learning from a seasoned pro was a great experience.

To begin with, my Brother-in-law and his dad removed a chimney that ran alongside the right side of the stove.  With the chimney out of the way, the refrigerator was moved to the opposite side of the room so that it wouldn't protrude into the doorway.  And then their kitchen stayed in that state for a few months until we could decide how to proceed.

 We removed the soffit above the space where the refrigerator was to make room for 42" cabinets.  Recessed lighting replaced the old fluorescent fixture.
Choosing a cabinet color was the trickiest part of this process.  My sister and brother-in-law were torn between choosing a "safe" cabinet finish that would be the best choice for re-sale down the line OR do they choose a finish that appealed most to their taste.  I finally asked my sister what type of kitchens she was most drawn to when browsing Pinterest.  A quick look at her dream kitchen Pinterest board pointed towards gray cabinetry.

After checking around the local home improvement stores, they settled on American Woodmark Cabinets sold by Home Depot.  The paint color they chose is called Stone and the door style is called Reading.  Removing the soffit allowed us to have all of the cabinets in the kitchen go to the ceiling, whereas before, we were dealing with two different heights.

We chose to add this pantry cupboard where the fridge used to be to give them additional food storage.  Just to the left of the pantry on the bottom set of cabinets is a pull out trash cupboard - which is essential for a small kitchen with a dog and a toddler.  You can't afford to lose valuable floor space with a trash can, and this pull out cupboard is great because it has two trash cans in it.  One for trash and one for recyclables.

This sink was somewhat of a debacle.  In the original kitchen, there was a very teeny tiny dishwasher, so compact that it barely held anything so my sister and brother-in-law just removed it to make way for a trash can.  It was easier to wash dishes by hand than to load such a tiny dishwasher.  But in their new kitchen, they really wanted and needed a dishwasher because they have a three person household now instead of two.  The length of this wall is just a little too short to accommodate a dishwasher and a standard sink base cabinet.  So we ordered a smaller sink base cabinet and a single basin (but VERY deep) sink.  We were afraid the sink was going to look out of place because it was going to be impossible to center it under the kitchen window.  But it worked out that the right edge of the sink lined up with the right side of the window!  And since the faucet is set into the back right hand corner of the sink, it drew less attention to the fact that the sink was centered under the window.  We could have avoided the problem by putting the dishwasher in the set of set of cabinets to the right of the window, but that would have meant turning around to load the dishwasher, which sounds like a disaster in my book!

That little space to the right of the sink base unit was just going to be a dead space covered by filler, but my dad said we could trim it out to create a small space to put cutting boards or cookie sheets/cooling racks, etc.  I'm glad we went ahead with that plan to give them a place to keep those awkward size items.

Here you can see that we shifted the stove about 30" to the left of where it used to be.  This created a countertop on both sides of the stovetop for more convenience when cooking.  The refrigerator is tough to see but it's to the far right.

Under cabinet lighting was easy to install as you simply plug in a transformer to an outlet inside the cabinets and the wire and light are attached under the cabinet.

At the last minute before placing our final order with Home Depot, we opted to add the shallow cabinet to the left of the microwave.  The wall was just going to be painted but then we realized you would see the side of the microwave when you come in the back door.  We are so happy we added that cabinet, even though it's only about 5 or 6" deep - as it is perfect for holding spices and cooking items right next to the stove!

Below you can see how the placement of the refridgerator no longer juts out into the main walking space.

My sister and brother-in-law chose this rustic iron look hardware from Hickory.  They went with the same pulls on the upper cabinets and lower cabinets for a consistent look.
The laminate countertop was ordered with a bull nosed edge that wraps around underneath the countertop.  
When you have a smaller house, you don't always get a dedicated dining area, such as the case in this home.  Luckily, they have an eat-in kitchen large enough to hold a small table and chairs.
We added the horizontal planked walls to make the dining area feel cozy and separate from the kitchen.  Home Depot ripped two sheets of plywood down for us, with each strip measuring 5 7/8" wide.  To begin planking the wall, we trimmed it out with 1x4's and then filled in with the planks, using a paint stick as a spacer between boards.
The planking ended up being a perfect way to transition the end of the cabinets to the wall behind it!
My sister chose this new light fixture to hang over the dining room table.
After choosing a cabinet color, flooring was the next hardest decision.  Hardwood floors were not an option because the rest of their home has the original hardwoods and there was no way we were going to be able to find material to match.  We looked into sheet vinyl because of its low maintenance and ease of cleaning but couldn't find anything we were in love with.  Tile was our last option, but we were so hesitant because I didn't want my sister to have to deal with keeping grout clean in a very high traffic kitchen, since their back door heads out to the garage.  But we found a tile from Lowe's that we liked and had decided that was the direction we needed to go in.  My sister and mom were out shopping at Home Depot and happened to walk down the laminate flooring aisle.  They found this product made by Pergo that looked like tile but was actually a laminate.  It looked identical to the tile we were about to purchase.  After reading the reviews about it's durability and ease of installation, we knew it was the perfect choice.  It installs like any other laminate, just click and interlock it!  The whole floor went down in a matter of hours, Brent said it was simple to install once you got the hang of it.  It's not as hard and cold as a tile would be, which is great for these guys with a baby crawling around.  They also have a large golden retriever and haven't had any problems with scratching from her nails.
My sister tells me that she and her husband still can't believe this is their kitchen, as they got everything they wanted and love each and every finish they chose.  For a full list of sources, please see below:

Cabinets - Home Depot American Woodmark Cabinets with Reading style door painted in Stone
Countertops - Wilsonart Spring Carnival
Flooring - Pergo XP Monson Slate
Cabinet Hardware - Hickory Hardware Refined Rustic Cabinet Pull in Black Iron
Sink - Blanco Diamond Dual Mount Composite Sink in Anthracite
Pendant light - Menards Tangier 1 Light Aged Bronze Mini Pendant 
Ceiling Color - Benjamin Moore White Dove in a flat finish
Wall Color - Benjamin Moore Gray Owl lightened to 50%
Plank Color - Benjamin Moore White Dove in a semi gloss finish
Backsplash Color - Sherwin Williams Peppercorn

DISCLAIMER: Hickory Hardware graciously provided the cabinet hardware for this kitchen.

Monday, September 29, 2014

Tour Through Blogland

Just recently, I was invited to participate in a fun little deal called the "Tour Through Blogland". The tour is a way to introduce readers to new and upcoming blogs. Heather from The Heathered Nest invited me to join and we have a funny connection - as we were both featured in the same article in USA Today Home magazine a few months ago. She started her blog shortly after appearing in that magazine...and good thing she did because you are going to love what she's been working on over at her house!

Here are some of my favorite projects from The Heathered Nest, click on the photos for direct links.

A barn-wood ceiling in their spare bedroom!
And their daughter's bedroom is going to melt your heart.
Please pay Heather a visit on her blog to see what else she's been working on!

So onto our home tour, I suppose...

We bought our house about 5 1/2 years ago, two weeks before our son was born.  Moving is always a great time (heavy sarcasm), especially when you're nine months pregnant with a toddler in tow.  But these last 5 years have been amazing and in large part because of this home.  We live in a beautiful neighborhood with tree lined streets and quaint little homes where you can always find a neighbor outside that's happy to stop and chat.
But the one downfall, ok, one of the major downfalls, of living in an older home is only getting a one car garage.  And our kitchen is located right behind the garage, so removing the garage and building a two car garage in the backyard is unfortunately not ever going to be an option for us.  But because we have a lot of tools and then all of the other stuff that comes along with owning a home - like a lawn mower, wheelbarrow, shovels, rakes, bicycles, etc...our garage filled up fast.  Which left us no where to work on the ever ending stream of woodworking projects that always seem to be on our "to-do list".  So we put this little workshop in our backyard to free up space in the garage.  You can read all about how we built it here.
Moving inside, this is our living room just inside the front door.  We gets lots of afternoon sun here, making it a great place to curl up in that gray chair in the corner with a book.  When we moved into this home, we had a full size sofa and a love seat, but after fighting with the layout for several years, I finally sold them on Craigslist and we slowly accumulated the furniture you see in here now.  The chairs are all from World Market but bought in sets, probably about 6 or 8 months apart.  Because of the size and layout of the living room, we found that having the four separate chairs makes the room feel lighter and it gives us more versatility if we feel like moving things around.  And as an added bonus, this living room doubles as Brent's yoga studio in the late afternoons, so it's much easier for him to move two small chairs than it is to move a sofa.
Next to the living room is our dining room.  Since we don't have an eat in kitchen, we actually use this room at least twice a day for meals, plus homework, plus blog writing, plus craft doing, plus coloring...you get the point.  
And I'm still surprised every day, to find that the majority of people that visit our blog is via Pinterest and specifically from this image.  It's our tiny galley style kitchen that we made over with only $200. Recently, we got super lucky and were gifted with some hardwood flooring that matches the the hardwoods in our living/dining area, so we'll be able to use that to lay in our kitchen at some point. See ya later, fake blue ceramic tile!
And lastly, this is our remodeled basement family room.  This is where we spend the majority of our time, playing games, watching movies, wrestling and dancing.
As a conclusion to the tour, I'm supposed to answer a few questions.

1.  What am I working on?

No big renovations are underway at this point.  The Kruses have switched back into "save" mode.     With a weekend family getaway approaching, Christmas shopping and an unplanned surgical procedure for our son in the near future (and a high deductible health insurance plan), we are stockpiling cash like crazy.  That means all large projects are on hold until we get through the next few months.  But I've got a one of a kind holiday project that the kids and I are working on and a little something for my sister in the works.  Both of which I'm excited to share sometime shortly down the road.  After the first of the year, we are hoping to start planning either a new covered deck or the attic remodel - we just haven't decided which one is more important on our priority list.

2.  How does my work differ from others of it's genre?

There are many wonderful blogs out there, full of creative people that craft amazing things, but I knew Brent and I had some things to share with the blogosphere.  Although we had no idea when we met, we now know we are perfect compliments to each other - in one regard anyway.  We make a great DIY team.  If Brent were in charge of furnishing our home, we would have one chair, several gigantic televisions, no kitchen table and definitely no extra "pretty" pillows on the beds or sofas.  That leaves me in charge of making our house a home, but unfortunately, I don't like shopping.  Actually, it's not the shopping I dislike, it's the spending.  So what's the cheapest way to dress our home?  Have Brent build it!  Brent can take any picture I draw for him and turn it into a beautiful piece of furniture, picture frame, workshop - whatever it happens to be that popped into my brain.  I may be the voice behind the blog, but all I'm doing in showcasing Brent's God given talents.  So that's what makes us a different DIY blog - you get Heidi AND Brent.  You might not hear his voice, but you'll get good, solid plans for building furniture and completing projects the right way.  Because he is borderline professional and he knows his way around a workshop.

3.  Why do I write/create the way that I do?

Growing up in a family that was submersed in construction and constant remodeling projects, DIY has been in my blood for a long time.  Even though Brent and I have been remodeling our homes for almost ten years now, with some much needed guidance from my dad, I never thought it was anything special because it came easily to us, mostly.  But the older we've gotten, we began noticing that what we were doing with our weekends (tearing out walls) was NOT what most of our friends were doing, NOR would they ever ENJOY doing.  So we started documenting the things that we build and create on this blog because I knew some of the things we were doing were unique, but more importantly, I knew we could TEACH others to do the same things.  With clear, step by step instructions and clear photos, anyone could do what we do.

Enough about me because I'm excited to introduce you to Mary over at Lemon Grove Avenue! She and her husband, Jay, recently made a big move from Michigan to North Carolina where they are currently renovating their adorable home.
I bumped into Mary's blog while searching Pinterest one evening for attic renovation inspiration photos.  They were in the middle of a remodel on the second story of their home back in Michigan and it was eerily similar to our second story of our home.  Here's how their master bedroom remodel turned out!
And as an added bonus, they are having their first baby - which means Mary will inevitably create a beautiful nursery!  I can't wait to see what comes up with next, so I follow along with Mary's blog, Lemon Grove Avenue, on Facebook and Instagram.  Now go check out her newly remodeled kitchen!

Sunday, July 20, 2014

A Long Distance Bathroom Remodel

Meet my adorable sister, Anne, and her equally adorable husband, Brian.  They live in a sweet little house below the bluffs in LaCrosse, WI - about 4 hours from our house in Sioux Falls.
Bought back in 2009, their house is a story and a half with this cozy main floor bathroom...
And this moldy tile.  Frowny face.
Anne and Brian were ready to update the bathroom with fresh tile and paint, since that's all we thought it needed.  The original tub is still in great condition, although it may have to be re-glazed in the next few years.  Does anyone have experience with this process?  We're wondering what the results are like, as we'll need to have ours done at some point, too.  The floor tile you see in the photo is that peel and stick vinyl stuff - and it's in decent condition here.
Since our family and my parents are usually only able to visit Anne and Brian for a weekend at a time, completing a medium scale bathroom remodel in 2 days would be tough - even for this family.  So to help speed things along, Anne and Brian got started on the demo a few weeks before family was to arrive.  This is my sister, showing no mercy to that old moldy tile.  In slippers.
Unfortunately, once they took all of the wall tile off, the years and years of moisture creeping through the wall tiles were showing a lot of damage.  
So the shower plaster needed to come off.  This is about how most home improvement projects go - and why they take twice as long as you expect and cost twice as much.  You just have to assume that anytime you're doing a remodel to figure in extra time and extra money!

Anne and Brian's friend came over to help with the demo of the plaster.  Why is it that anytime there's demo to be done, it turns into one big party when guys are involved?  I suppose demo satisfies some natural instinct in males to tear things apart.
You can see here how thick this plaster was!  I'm selfishly pretty happy that we weren't around for "demo dayz" - that plaster must have been super heavy and dusty.
Skip ahead to my parents arrival.  They helped to get the new backer board installed and included a shampoo bottle niche with a marble ledge.  You're probably thinking "that shampoo bottle niche is a little large, isn't it?"  Well, you don't know my sister.  Showering at her house is like visiting a spa...so many creams and lotions and potions and exfoliating face washes and multiple shampoos and conditioners.  Quite the inventory as compared to the three products in Brent and I's shower - shampoo, conditioner, soap.
With the backer board up, Brian and my dad could begin the tile work.  My dad was beginning to install a soap dish until someone kindly pointed out that no one in that house (or anywhere?) uses a bar of soap so it really wasn't necessary.  So the soap dish got voted off the island.
Here's Brian, carefully tiling away.
My dad is installing a waterproof membrane into the corners to protect against moisture.
And then, out of nowhere, someone made the decision to pull up the vinyl floor and put down new tile while the bathroom was all tore up.  That's how my family rolls.
At this point, my parents had to head back to Sioux Falls - but Brent and I were rolling into LaCrosse shortly after.  We spent the weekend grouting the walls and the floors with a dark gray grout - and that was A LOT of grouting!

At some point, Anne and I painted their existing vanity a charcoal color to contrast against all of the white.
Here's a close up of the floor tile they chose.
And their new subway tile shower!
New plumbing fixtures.
I told you that she had a lot of shower products.
The existing vanity they had was in great shape and a perfect size for the small footprint of this bathroom.  There was no reason to take it out and replace it!  Plus, anytime you mess around with plumbing, you're asking for more problems.  If something works - leave it alone!
Sometimes it's fun to see a side by side of the before and after, so here ya go!  They estimated that this entire remodel cost them about $600 - subway tile, floor tile, paint and miscellaneous tiling supplies.  Not. Too. Shabby.
If you like this project, follow us on Facebook to see what else we're up to!

Monday, December 9, 2013

Crazy for Burlap

On a recent trip to Kirkland's in Minneapolis, this little print of burlap wrapped around a canvas stood out to me.  It looked like something that would look pretty in our home but would also be something fun to make.  As that idea simmered for a few weeks, I happened to be over at my neighbor's house and she mentioned that she had just seen the most beautiful blue burlap.  At the mention of blue burlap, I was in.

We had 4 canvases laying around in our basement from a past project for Owen's nursery.  They had to come down though because they used to hang above his crib and he thought it was funny to knock them down and watch me slither under his crib to retrieve them.  Mama don't play that game.


Tearing the old fabric off was easy.  Let me re-phrase that, watching Brent tear the old fabric off was easy.


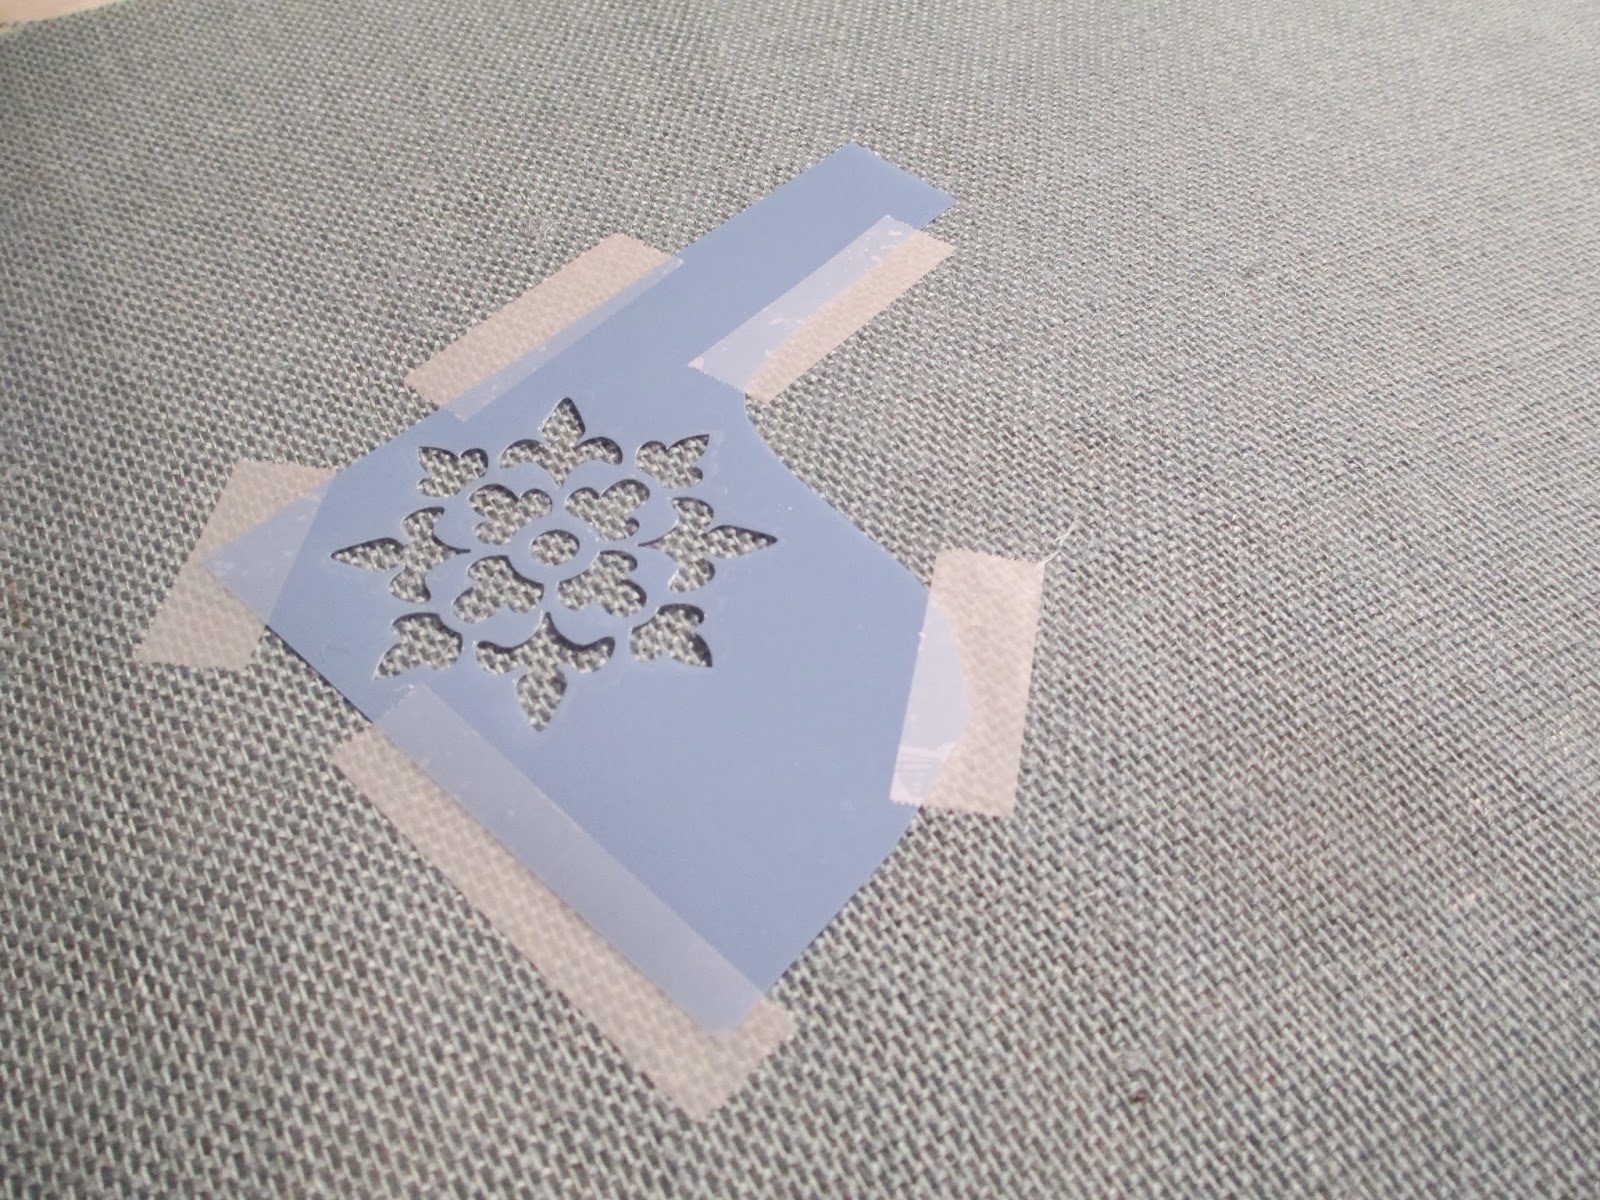
The plan was to stencil snowflakes onto the burlap with paint and then wrap the burlap around the canvas.  These are the supplies we used.  Canvas, burlap, paint, stencil brushes, snowflake stencil and a staple gun.


First we cut the burlap to size.  I know what you're thinking...that is one gorgeous bolt of burlap.  


Sometimes I have extreme moments of genius (I would say often, Brent would say rarely) and in this case, I decided it would be best to do all of the stenciling on the flat piece of burlap first and after it was all dry, we would staple the printed burlap to the canvas.  Here's my reasoning...burlap has a very loose weave, I knew when we stamped paint on it, it was going to bleed through and I didn't want the white canvas getting all mucky.  Brent laid a giant piece of poly across our dining room table to do the stenciling on.

We wanted to try a test piece first, since this was our first ride on the stenciling wagon.


Picture me singing, dab-a-dab-a-dab dab da dab.


This first one was slow going.  Turns out it is actually hard to screw this up.  As long as you dab straight up and down and hold the stencil firmly, the paint doesn't bleed under the stencil.


When it was time to move on to the real deal, I was nervous, sweaty, jittery.  A lot like my first date, which didn't happen until college.  Brent still chuckles at that - I think because he knows what a catch I am.  My hands hurt from holding down the first one so I let scotch tape do the work from then on.


While I was working on mine, Brent helped the kids work on theirs.  Owen's face doesn't look like that because he is excited about the stenciling.  He is a boy and is constantly just yelling random things and making weird sounds - can I get a "what what" from all the other mom's out there that have the pleasure of raising these tiny gentleman!


If there's one thing Brent loves, it's stenciling.  And scrap booking.  Which he affectionately refers to as crap booking.  Brent, you look very manly with that tiny brush in your delicate hands.


Emma eventually came over to assist on mine.


It worked best to apply the snowflakes in layers.  I first put white snowflakes all over and let them dry.  Next a layer of the blue and then red.  We repeated that process with another round of the colors overlapping a few here and there.


When it was all dry, we rolled the burlap over, laid the canvas on top and stapled it tight.


I held the fabric taut while Brent stapled.  


I trimmed off the excess fabric when we were done.


And.....BOOM goes the dynamite.  Sorry, had to work that in since I just recently learned where that phrase came from.


I know that we could have bought something like this from the store, probably for about the same amount of money, but it's these little projects that the kids have so much fun making with us!  You should have seen Emma's eyes light up when she saw it hanging on the wall, she said it was beautiful and was so proud that she got to be a part of its creation.  And I'm sure "stenciling" will look great on her future resume!  Owen, on the other hand, was mostly unimpressed.  Typical.