Showing posts with label shed. Show all posts

Sunday, June 15, 2014

Workshop Progress

We are beginning to dip our toes into the uncharted territory or interior workshop construction.  To make this shop functional, there's one small thing we need.  Electricity.  With a bucket load of other projects that had to get done right away, we have resorted to plugging in an extension cord in our bedroom and running it out the window into the backyard to plug in our neighbors miter saw that he loaned us.  You see, we have a brand new beautiful saw, but no power in the shop to turn it on.  Sad face.

A weekend freed up so Brent took the opportunity to progress toward that electrical goal.  I helped for all of an hour, got bored and frustrated that I couldn't do more to help him...plus, that OSB is really heavy...so Brent and I agreed that it would be best for our sanity if I went inside to take a nap.  He didn't actually say that, but that's what I told myself.

Anyway, he installed the outlets and pulled wiring to them.  Wish I could tell you more about that step but I would fall asleep from boredom before I could finish the sentence.  After the outlets were wired, he put insulation between the studs and screwed OSB over top.
Not to exciting, huh.
It's a little hard to see all of the electrical he's been running behind all these cabinets but I can assure you, it's there.
Lookin' good and working hard, Brent!  Sorry I swept up that pile of sawdust and then didn't put it in the trash can so now you have to work around it.  Right next to Brent is our wood stove that we'll be installing.  South Dakota winters get cold but this workshop is gonna be hot, hot, hot!
Once the walls had been insulated and sheathed, he moved onto the same process for the ceiling.  
In this next photo you can see the shop layout starting to come together.  We had a bunch of random cabinet bases to use as the bench to support the saw.
The black and yellow plastic totes under the saw currently hold our wood drop off.  We use the scrap in our backyard fireplace and eventually will use it in the wood stove to heat the workshop through the winters.

We found this wall organizer at Menard's for $30.  It holds a ton of screws and all of the other little hardware pieces that we usually have just floating around.
 Here's the roof, mostly insulated with a little bit more sheathing to go.
 And lastly, we added some exterior lighting to the workshop.  We are still without electricity back there, so we can't turn them on yet but they are motion activated so we didn't even have to put them on a switch.
To wrap up the outside we'll still need to add some gutter.  I'm trying to talk Brent into using rain chains instead of downspouts if they aren't too expensive.  Does anyone have experience with rain chains and whether or not they work well?  Luckily, we don't really have to worry too much about keeping water away from the foundation like you would in a house but we still need the water to shed away from it.

Monday, May 12, 2014

How To Build Flower Boxes

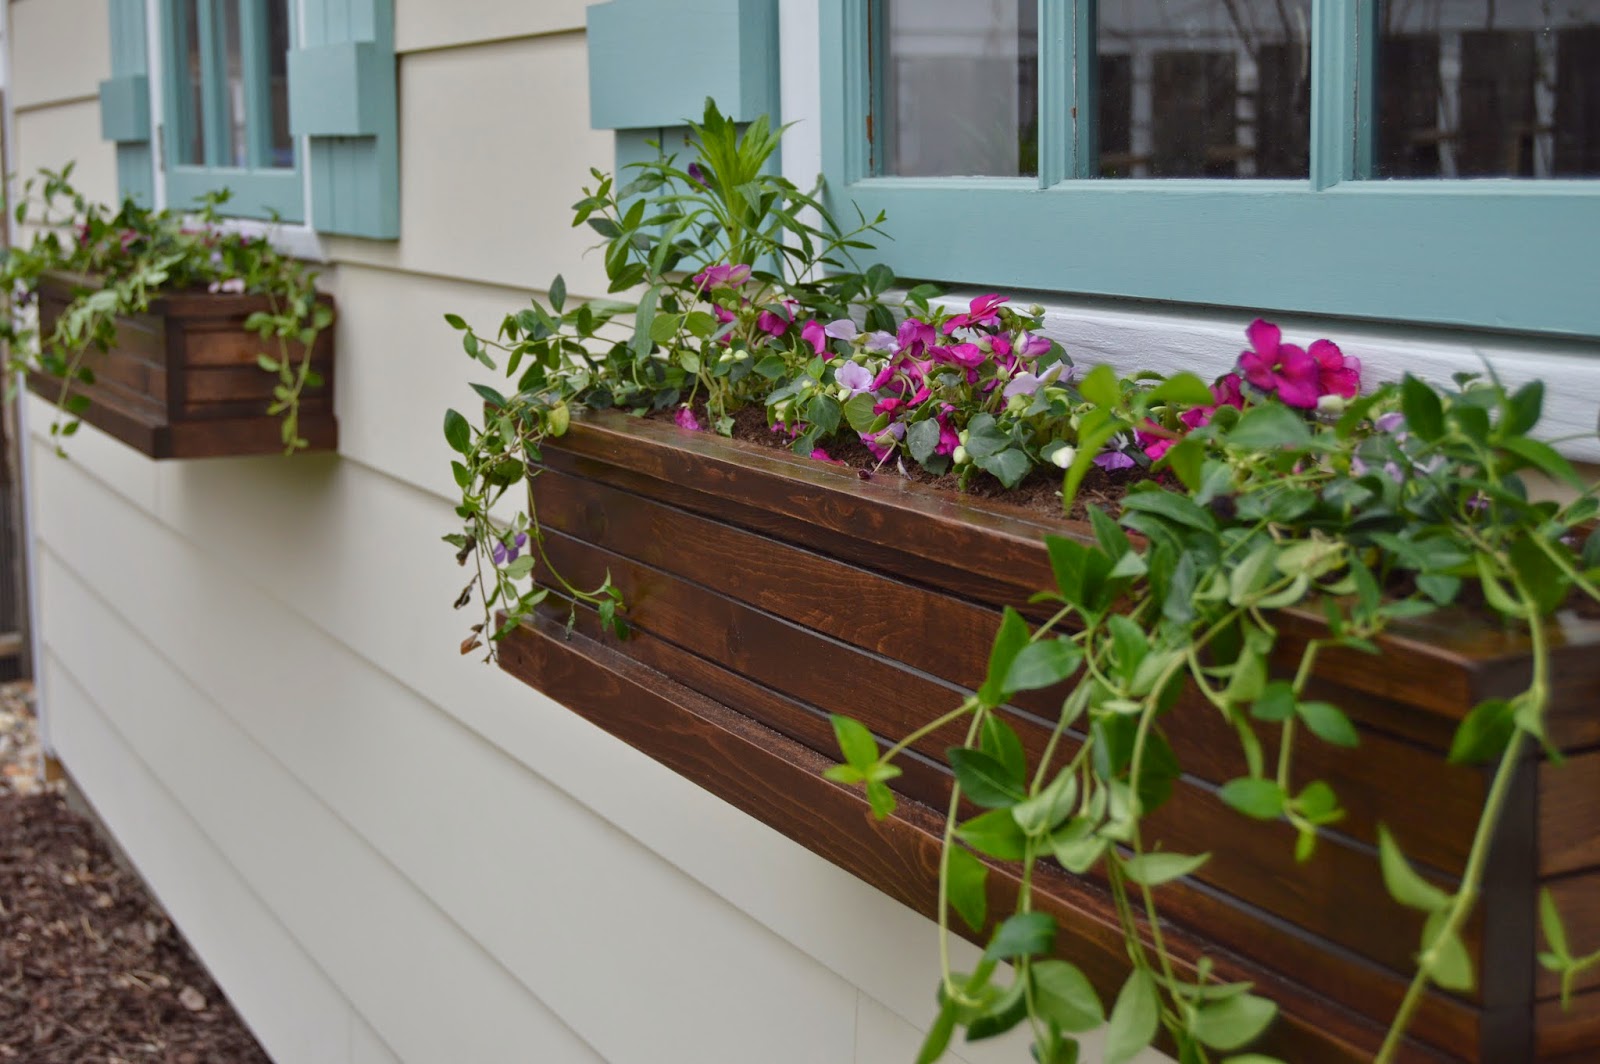
A year ago, when Brent and I began planning our workshop, I could already visualize sweet little flower boxes on it.  Knowing there were a ton of other details that needed to come first, we put off building them...until THIS WEEKEND!  We wanted something a little different than the standard white boxes with brackets you see everywhere, so here's what we came up with.
If you want to build some for yourself, you'll need about 3 1x4's per box, which should be about $15 worth of lumber.  Brent ripped the 1x4's down into strips.
Here's an important step, I used an orbital sander to round off the edges of all the front and side pieces to create grooves.
If I hadn't rounded off the edges (Brent says this is called "breaking the edge"), the fronts and sides would look flat.
 I'm not going to provide any exact measurements because all of the dimensions can be cut to accommodate whatever width you need, depending on your window size.
After attaching the fronts and sides to the inside support pieces, Brent cut a piece to act as the bottom of the flower box.  You can use a 1x8 cut to size or a couple 1x4 pieces next to each other.
Then cut a piece to size for the back and attach to the interior supports.
I wanted to add some additional detail to give the flower boxes a more substantial feel.  The piece around the top is some 1x4 ripped into about a 1 inch width.  The bottom piece is 1x4 cut at around 2 inches wide.  That's the nice part about designing these flower boxes, you can completely customize all of the measurements and details to suit your taste.
At this stage, I sanded everything again with the orbital sander, making sure to round off all of the hard edges.  I also used a sanding block to get into the tight areas.  
Deciding how to finish them was the tricky part.  I always assumed I would paint them white to match the flower boxes on the front of our house, but after seeing this picture on Pinterest, I definitely wanted to stain them!  I applied two coats of American Walnut stain (one didn't get them as dark as I wanted) and three coats of spar varnish.
I even brushed three coats of spar varnish on the insides of the flower boxes to protect the wood from all of the moisture.
Lucky for me, I got to get up at 7:15 on Mother's Day morning to start applying the coats of varnish!  The coats dry really quickly, so by noon, they were all done and ready for flowers.  We lined the boxes with landscape fabric to prevent dirt from seeping out the fronts and sides.
 To hang them on the workshop, we bought these galvanized L brackets.  Make sure you don't buy brackets made of zinc or they will rust out.
I'm so happy that we went with the stained flower boxes - I think the color of the boxes ties the mulch color (looks like we need to add more mulch!) and roof color all together.  
 The kids and I also had time to put down new mulch in the front gardens and plant the flower boxes under the two large windows.  Emma, Owen and I essentially spent the entire weekend digging in the dirt - which made for a PERFECT Mother's Day weekend!

Monday, April 7, 2014

The World's Tiniest Deck

Spring clean up has officially begun!  I wish I had some special tricks to offer you to get things done faster...but I don't.  If you want your yard to look good this summer, you've gotta put down that TV remote, put on some old clothes, pour a cup of coffee and get your buns in gear!  We've been waiting for the weather to warm up enough to allow us to work outside and Saturday morning, it happened.  It was probably below 40 degrees when we headed outside at 8am but that's an awful lot warmer than what we've been experiencing.

It's been a crazy month for us and it looks like things are only going to ramp up from here.  We were excited to find out that our workshop was pictured in a magazine!  Like, a real one, that people actually pay money for.  Unless you're the type that like to read them for free over coffee at Barnes and Noble.  Nothing wrong with that either - and if you are, pick up a copy of USA Today HOME and turn to page 61.  I wish this could be super awesome and I could tell you that we won some contest money for it - but we didn't.  It actually COST us $12.00 - the amount it set me back to buy a couple copies for memorabilia sake.  That's cool though, who needs more money, right?  I guess if we actually had a bucket list and we happened to write "Be in a magazine" on it, we could have crossed it off.


So right off the heels of the whole magazine thing, we get another exciting opportunity that I will tell you more about later - it might be a ways off so we'll wait until we know more to share the details.  But in order to get ready for this next opportunity, we needed to get our patio cleaned up.  I was looking at our patio table and chairs and they were looking a little sad.  We put a fresh coat of sealer on them a few years ago when I was hosting a bridal shower for my sister at our house, but they've been neglected since then.

Oddly enough, this story isn't about our patio furniture though - because that project isn't quite done yet - this story is about what happens when you are going crazy with the stain and looking for anything that might benefit was a protective coat.  Since I had all the stuff out to stain the patio furniture and it was busy drying, I decided it was time to tackle that teeny weeny little deck on the front of our workshop.

It was still just the construction lumber without any sealant or protective coat on it - unless a ton of muddy footprints are considered protective.  We went over the deck two times with an orbital sander using 120 grit sandpaper.

This is post-sanding and pre-stain.  Not perfect but that's where I like to throw in the word "rustic".

Here's the stain we picked up to use.  And honestly, usually I like to research this stuff a little bit before jumping into a purchase, especially since a gallon of stain is kinda spendy - but frankly, I was just so excited to get outside and work on a project that I just point to a stain color on the sample board at the store and said, "I'll take a gallon of that."  Luckily, it worked out great!

This is my trusty outdoor staining brush.  It doesn't look pretty but it really works well.  The natural bristles do a great job applying the stain and the short sturdy bristles make it easy to jam stain into hard to reach areas.

Here I am at the halfway point.  It probably took about 10 minutes, or less to do the first half of it.  I spent more time tugging my pants up so my neighbors wouldn't have to see my back side, than I did actually staining.  Poor plumbers - I understand.  

All done and looking fine.  Seriously, a 20 minute job guys and it looks way better!  Here's a before and after - because we all love a good before and after, don't we?!

As soon as our patio furniture is dry, we'll be able to get some pictures - I'm excited to see those before and after photos because they should be significant, too!

Wednesday, June 12, 2013

The beginning of Kruse's Workshop.

Our neighbor is giving us his one car garage so he can build a two car.  We have our foundation prepped and plan to pour the concrete this Saturday.