Showing posts with label gray paint. Show all posts

Wednesday, April 27, 2016

Kitchen Remodel

Some time ago, my sister and her husband, who live about 4 hours away from us, started dreaming of a new kitchen.  You can see in the photos below that their kitchen was difficult to work in and not a joyful place to be.  The refrigerator blocked the doorway that leads to the basement and to their exterior.  An old, unused chimney was taking up valuable space and the stove top was pressed against a wall, making it very difficult to put pans on half of the burners.

Planning for a full kitchen remodel is a long and daunting task.  Trying to keep within a reasonable budget but also creating a dream kitchen is a difficult balance to strike.  I can easily say it took months and months of planning and sketching to figure out what we were going to do with this space. Luckily my Dad has done plenty of kitchen remodels so working alongside him and learning from a seasoned pro was a great experience.

To begin with, my Brother-in-law and his dad removed a chimney that ran alongside the right side of the stove.  With the chimney out of the way, the refrigerator was moved to the opposite side of the room so that it wouldn't protrude into the doorway.  And then their kitchen stayed in that state for a few months until we could decide how to proceed.

 We removed the soffit above the space where the refrigerator was to make room for 42" cabinets.  Recessed lighting replaced the old fluorescent fixture.
Choosing a cabinet color was the trickiest part of this process.  My sister and brother-in-law were torn between choosing a "safe" cabinet finish that would be the best choice for re-sale down the line OR do they choose a finish that appealed most to their taste.  I finally asked my sister what type of kitchens she was most drawn to when browsing Pinterest.  A quick look at her dream kitchen Pinterest board pointed towards gray cabinetry.

After checking around the local home improvement stores, they settled on American Woodmark Cabinets sold by Home Depot.  The paint color they chose is called Stone and the door style is called Reading.  Removing the soffit allowed us to have all of the cabinets in the kitchen go to the ceiling, whereas before, we were dealing with two different heights.

We chose to add this pantry cupboard where the fridge used to be to give them additional food storage.  Just to the left of the pantry on the bottom set of cabinets is a pull out trash cupboard - which is essential for a small kitchen with a dog and a toddler.  You can't afford to lose valuable floor space with a trash can, and this pull out cupboard is great because it has two trash cans in it.  One for trash and one for recyclables.

This sink was somewhat of a debacle.  In the original kitchen, there was a very teeny tiny dishwasher, so compact that it barely held anything so my sister and brother-in-law just removed it to make way for a trash can.  It was easier to wash dishes by hand than to load such a tiny dishwasher.  But in their new kitchen, they really wanted and needed a dishwasher because they have a three person household now instead of two.  The length of this wall is just a little too short to accommodate a dishwasher and a standard sink base cabinet.  So we ordered a smaller sink base cabinet and a single basin (but VERY deep) sink.  We were afraid the sink was going to look out of place because it was going to be impossible to center it under the kitchen window.  But it worked out that the right edge of the sink lined up with the right side of the window!  And since the faucet is set into the back right hand corner of the sink, it drew less attention to the fact that the sink was centered under the window.  We could have avoided the problem by putting the dishwasher in the set of set of cabinets to the right of the window, but that would have meant turning around to load the dishwasher, which sounds like a disaster in my book!

That little space to the right of the sink base unit was just going to be a dead space covered by filler, but my dad said we could trim it out to create a small space to put cutting boards or cookie sheets/cooling racks, etc.  I'm glad we went ahead with that plan to give them a place to keep those awkward size items.

Here you can see that we shifted the stove about 30" to the left of where it used to be.  This created a countertop on both sides of the stovetop for more convenience when cooking.  The refrigerator is tough to see but it's to the far right.

Under cabinet lighting was easy to install as you simply plug in a transformer to an outlet inside the cabinets and the wire and light are attached under the cabinet.

At the last minute before placing our final order with Home Depot, we opted to add the shallow cabinet to the left of the microwave.  The wall was just going to be painted but then we realized you would see the side of the microwave when you come in the back door.  We are so happy we added that cabinet, even though it's only about 5 or 6" deep - as it is perfect for holding spices and cooking items right next to the stove!

Below you can see how the placement of the refridgerator no longer juts out into the main walking space.

My sister and brother-in-law chose this rustic iron look hardware from Hickory.  They went with the same pulls on the upper cabinets and lower cabinets for a consistent look.
The laminate countertop was ordered with a bull nosed edge that wraps around underneath the countertop.  
When you have a smaller house, you don't always get a dedicated dining area, such as the case in this home.  Luckily, they have an eat-in kitchen large enough to hold a small table and chairs.
We added the horizontal planked walls to make the dining area feel cozy and separate from the kitchen.  Home Depot ripped two sheets of plywood down for us, with each strip measuring 5 7/8" wide.  To begin planking the wall, we trimmed it out with 1x4's and then filled in with the planks, using a paint stick as a spacer between boards.
The planking ended up being a perfect way to transition the end of the cabinets to the wall behind it!
My sister chose this new light fixture to hang over the dining room table.
After choosing a cabinet color, flooring was the next hardest decision.  Hardwood floors were not an option because the rest of their home has the original hardwoods and there was no way we were going to be able to find material to match.  We looked into sheet vinyl because of its low maintenance and ease of cleaning but couldn't find anything we were in love with.  Tile was our last option, but we were so hesitant because I didn't want my sister to have to deal with keeping grout clean in a very high traffic kitchen, since their back door heads out to the garage.  But we found a tile from Lowe's that we liked and had decided that was the direction we needed to go in.  My sister and mom were out shopping at Home Depot and happened to walk down the laminate flooring aisle.  They found this product made by Pergo that looked like tile but was actually a laminate.  It looked identical to the tile we were about to purchase.  After reading the reviews about it's durability and ease of installation, we knew it was the perfect choice.  It installs like any other laminate, just click and interlock it!  The whole floor went down in a matter of hours, Brent said it was simple to install once you got the hang of it.  It's not as hard and cold as a tile would be, which is great for these guys with a baby crawling around.  They also have a large golden retriever and haven't had any problems with scratching from her nails.
My sister tells me that she and her husband still can't believe this is their kitchen, as they got everything they wanted and love each and every finish they chose.  For a full list of sources, please see below:

Cabinets - Home Depot American Woodmark Cabinets with Reading style door painted in Stone
Countertops - Wilsonart Spring Carnival
Flooring - Pergo XP Monson Slate
Cabinet Hardware - Hickory Hardware Refined Rustic Cabinet Pull in Black Iron
Sink - Blanco Diamond Dual Mount Composite Sink in Anthracite
Pendant light - Menards Tangier 1 Light Aged Bronze Mini Pendant 
Ceiling Color - Benjamin Moore White Dove in a flat finish
Wall Color - Benjamin Moore Gray Owl lightened to 50%
Plank Color - Benjamin Moore White Dove in a semi gloss finish
Backsplash Color - Sherwin Williams Peppercorn

DISCLAIMER: Hickory Hardware graciously provided the cabinet hardware for this kitchen.

Monday, January 19, 2015

Kids Bedroom Makeover Part 1 - Paint

Thankfully, I had a three day weekend - because I needed every single second of it to get Emma and Owen's room back to a livable state.  I really, really, really wish I would have decided to paint their room BEFORE we moved the bunk beds in.  It wouldn't have been a big deal to move the beds out for the weekend if the frames fit through the bedroom door, but they don't, which means we would have had to spend a few extra hours taking them apart and relocating to the living room.  I knew we could work around them but it got preeeeetttttyyyy tight.
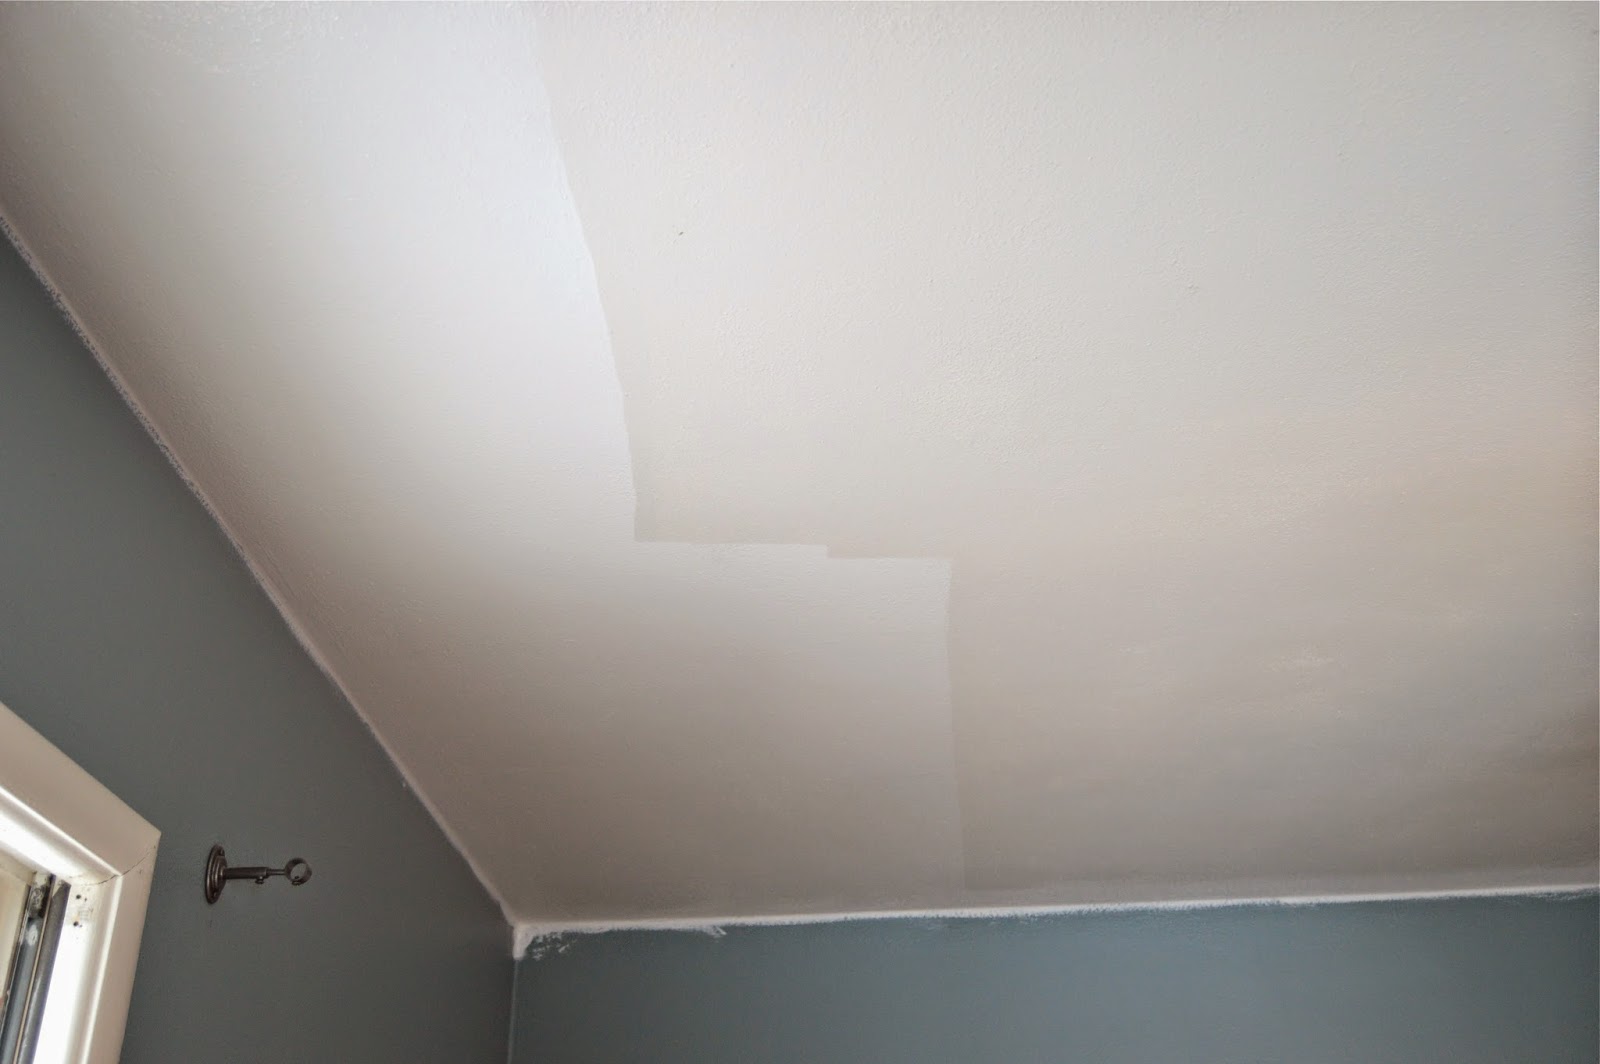
I went back and forth about whether or not to paint the ceiling...in the end, I knew I would kick myself for not doing it so I stopped pouting long enough to get it done.  And I never thought I would have such a tough time choosing a shade of white for this room!  Pinterest makes it way too easy to become indecisive.  Benjamin Moore White Dove seemed to be a no-fail white from the things I read, so ended up doing one coat of that color in a flat finish on the ceiling.  It was very apparent right away that it was the right decision.  You can see from the photo below how dingy the ceiling had become.
 The great part about Benjamin Moore White Dove is that it is also a great shade of white to use for trim and doors, so we also picked up a gallon of semi-gloss in White Dove.  Emma scrubbed all of the little cracks of the windows with an old toothbrush while we were painting.
 All of the trim and doors received two coats of semi-gloss.
 For the walls, I picked Benjamin Moore Revere Pewter.  It's the same color we have in the living room/dining room and adjoining hallway to the kids room.  I think its going to be a great backdrop for the other things we have planned for their room!
 It was a little tough to get a good photo of the room below...we can't put the bunk beds back into the recessed area yet because that wall will be getting some special treatment.  So just pretend that portion of the beds isn't blocking the view :)
 You can really tell in this next photo how crisp and clean the doors and trim feel with the new paint color.  There were a lot of little fingerprints on the old paint that momma couldn't scrub off anymore!
 The blue wall at the back of this photo is normally where the beds would scooch into - but we're not done back there yet so the beds have to stay in the middle of the room for another week.
Next, we'll be addressing the biggest problem of this bedroom - the lack of lighting.  We went back and forth with several different options to add lighting and we think we've come up with a great solution.  Hopefully we'll have that done by next Monday!  At this point, I'm just relieved the kids can sleep in their own beds again tonight.  All weekend they have been sleeping on a second bed we have upstairs in our master bedroom while we were painting.  I know it was fun for Emma and Owen because it has felt like a big sleepover - but mom and dad are ready to move them out :)

Thursday, January 15, 2015

Movin' On Up

I get bored.  Easily.  Which is why I'm always making things, building things, painting things and daydreaming about things.  If I don't have a project that I'm working on or towards, you can't tell the difference between me and a lazy sloth.  Of course there are always chores to do, but unless I have a reason to hurry through the chores to get to something better, my motivation sinks like a rock in a bucket.  On a recent snow day, I was home with the kids since school got canceled.  At one point, I was so bored that I dumped out a clean pile of laundry on our bed, with the best intentions of folding it - but instead I climbed on that warm fluffy pile and took a nap on it.  Like a cat.

Not my proudest moment, but it was then that I really started pressuring Brent into letting us get the gears in motion to dive into a project.  Money is a little tight around the Kruse house right now, we are paying for some hefty medical bills for Owen and we are also trying to ramp up our vehicle savings account since Brent's minivan could go at any moment.  This means we can't do anything major like a bathroom remodel or attic renovation.

But what we can do is increase our home's square footage by about 500 square feet.  Let me explain...we have two bedrooms on our main floor, Brent and I have one and Emma and Owen share the other one (with bunk beds).  The whole second floor of our house is one gigantic room, which is technically Emma's room, that has been acting as a playroom for the last 5 years.  Click here to view a tour of the second floor of our house.  The kids mostly only go up there when a friend comes over to play.  Emma's clothes remain up there in a fairly large closet because the closet in Owen's room isn't large enough for both of their things.  So each morning, Emma puts on her thick fleece robe and slippers to run up there to pick out an outfit - that's the fastest I ever see that girl move because IT IS CHILLY UP THERE!  It's not uncommon for her clean laundry to just get stacked on her stairs because no one wants to make the trip up into the arctic air.

This arrangement has worked ok for us for the past 5 years but we are all ready for a change.  Brent and I could barely squeeze our clothing into the tiny closet in our master bedroom and we were ready for extra breathing room since our new California King bed was taking up most of the floor space.  Click here to view a tour of our original master bedroom and kids room.  It's time to move our master bedroom to the second floor and create a little retreat.

With our main floor bedroom empty, it was a perfect opportunity to move the kids' bunk beds into our old bedroom.  It's larger than their current room, there's plenty of room for both of their clothing to fit in the dressers and the closet.  Plus, it's much warmer than their old bedroom, which was drafty from all the windows.

But it turns out, moving the bedrooms around wasn't enough to satisfy my overly bored brain, so I decided I may as well spend the next few weeks/months fixing up their new room for them.  The color on the walls was great for Brent and I's room, it made it feel dark and moody and relaxing.  But for the kids, I want something light and bright with storage for their toys and books.

Here's what we're starting with - I was too tired to bother picking up toys and making the beds before I took these pictures - I'm sure many of you moms can relate :)
Painting trim/doors and walls begins tomorrow night!  And over the next few weeks and possibly months, we've got lots of other fun projects in store to make this room functional and comfortable for the kids.

Sunday, May 4, 2014

We Are Going Gray! (And We're OK With It)

The weatherman was forecasting cold, wind and rain for the upcoming weekend - which meant Brent and I were going to have to put our outdoor projects on hold.  With all the beautiful weather we have had as of late, it's been easy to push some important indoor jobs to the backburner.  Mostly I'm referring to this little snafu.
Yep, that's our basement shower floor.  I'll go into much more detail later on about what's happening here...but what you need to know at this point, is that it has looked like this for about 2 months now.  We weren't incredibly motivated to repair it right away because there were other, much more exciting things to work on.  So the four of us just moved into the main floor bathroom and we've been there ever since. 

But four Kruse's can barely fit in one small bathroom at the same time, and yes, I did say at the same time.  Those of you with small children understand that for whatever reason, if there's one person in the bathroom (for WHATEVER reason), the rest of the family will soon follow.  And it's tight, guys.  There have been many evenings where all four of us are trying to brush our teeth around the same tiny sink.  It's borderline comical.  Fact is - we really needed to get that basement bathroom done - if even just for our sanity.  

Problem is, fixing the shower floor is a one person job, and by one person, I mean Brent.  Which meant I was going to need to find a way to stay out of Brent's hair for an entire weekend.  Not easy.  There was only one thing I could think of that I could do with complete independence and would keep my focus for two days straight - PAINT!  

For months, I've been toying with the idea of changing the paint color in the living/dining room.  It was becoming more and more evident that everything in the room was brown.  Brown floors, brown furniture (dining room table/buffet), brown paint.  It was a nice, cozy color, but my heart ached for more contrast #firstworldproblems.  So with $50 bucks in my pocket, I wasn't planning on poppin' tags - I was gonna buy some gray paint.
It took me a few days of deliberation to decide between Benjamin Moore Revere Pewter and Edgecomb Gray but in the end, I went with Revere Pewter so I could have a little more contrast between the walls and the white woodwork.  Home Depot color matched it for me with their Behr paint.

Of course, the before and after is the best part of any transformation, so I'll break this down into immediate before/after photos so you don't have to scroll all over to detect the changes.
The colors from this photo I took in my backyard, would tie in well with our living room.  
I think the dining room underwent the greatest transformation - that heavy brown paint below the chair rail weighed down the room.  Painting it white made it feel lighter and a little more cottage-like.  To cover the semi-gloss brown, I first applied a coat of white primer and then two coats of semi-gloss white paint, the same that I use on all of our trim.  It's called Cotton White by Diamond Vogel.
 A rug under the dining room table would look fantastic - but until Owen can manage to get the majority of his breakfast and dinner into his mouth, a rug is just not practical.  His chair, the one closest to the camera, is literally stuck to the floor most of the time.
I also like the contrast of the oil-rubbed bronze hardware on the gray paint, as opposed to the brown.
 
 Even my beloved Kirkland's clock looks amazing with this paint color!
In short - we absolutely love (lets be honest, Brent could probably care less either way) this paint color. Everything feels lighter, fresher and a bit more modern.  It was $50 and weekend well spent.

If you like this project, follow us on Facebook to see what else we're up to!